HOW TO GIVE B12 INJECTIONS
Important warnings
Please download and read this safety information letter . Instead of downloading, you can also view the safety information online .
Important safety information
Risk of introduction of bacteria under the skin during the injection
It is therefore important that you wash your hands and avoid touching the sterile parts of the needle and syringe during the injection.
At times the needle can hit a small blood vessel causing a small amount of bleeding under the skin
This causes a bruise to appear which resolves over a few days. To avoid larger bruises, apply moderate pressure to the injection site with cotton wool or gauze for a few minutes after the injection.
Injecting in the wrong area can cause an abscess to form under the skin
To avoid this only inject in the area recommended by your nurse or doctor. Do not inject into a painful or inflamed area. Seek medical advice if this happens.
Additional notice
Please note Ivy Grove surgery cannot accept responsibility if the instructions given by your nurse or doctor are not followed and result in injury.
If you are struggling to follow the instructions in the video or have questions, please do not hesitate to contact us and we will do our best to assist you.
Please also download and read this step-by-step guide leaflet . You may wish to print it out for ease of reference.
You or your care-giver are advised to read through the whole guide before carrying out your first injection.
Equipment required
- 3ml syringe
- green needle
- blue needle
- B12 ampoule
- cotton wool
- sharps box
Step-by-step guide
- Step 1. Wash your hands thoroughly
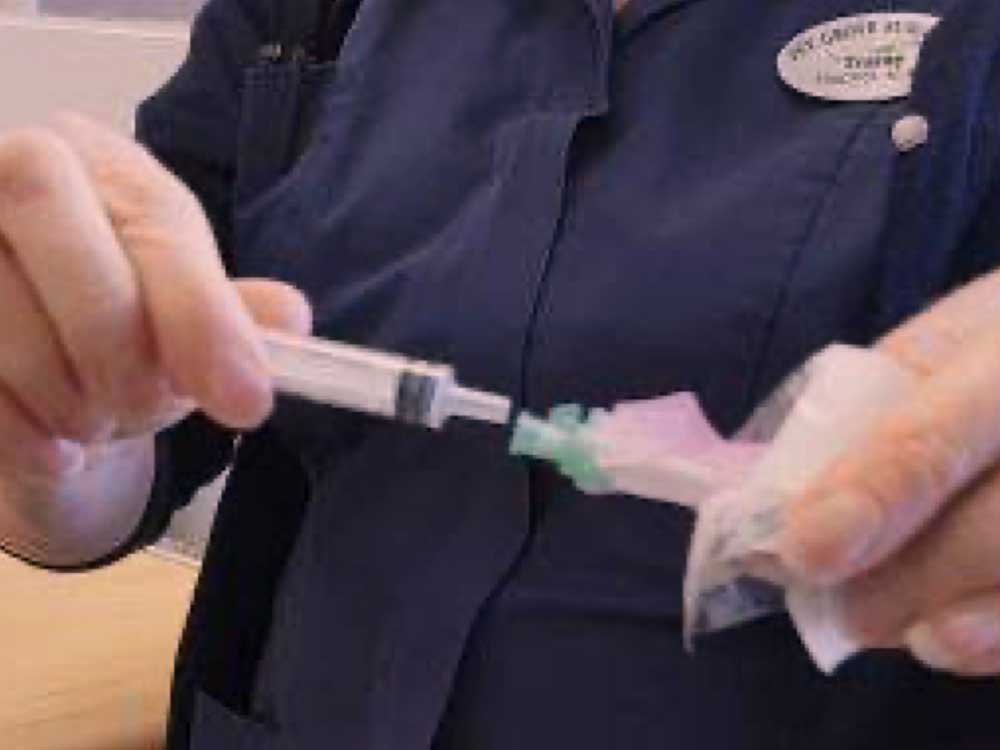
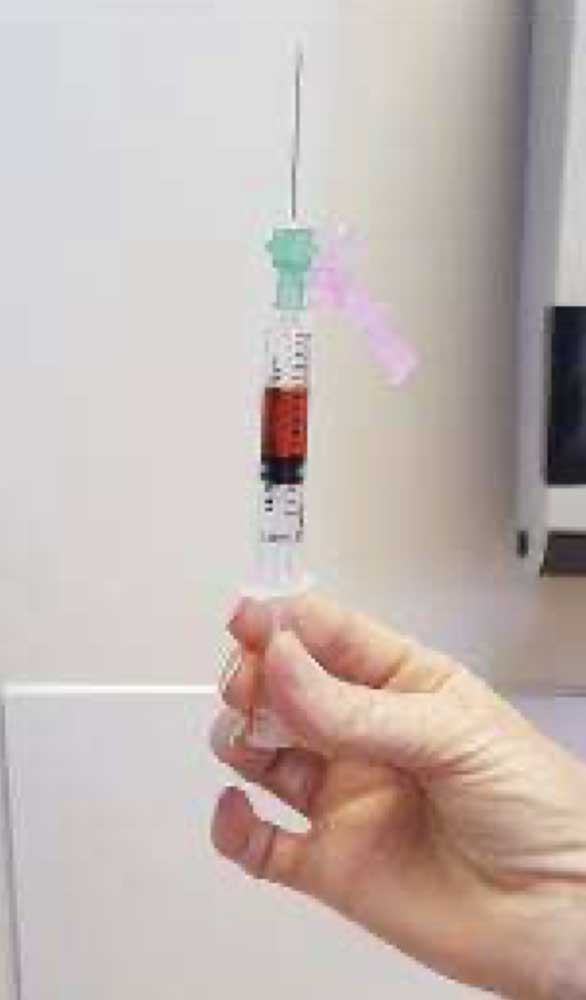
- Step 2. Attach green needle to syringe without touching the ends that will connect:
Connect the needle - Step 3. Shake or tap all the red fluid into the bottom part of the ampoule
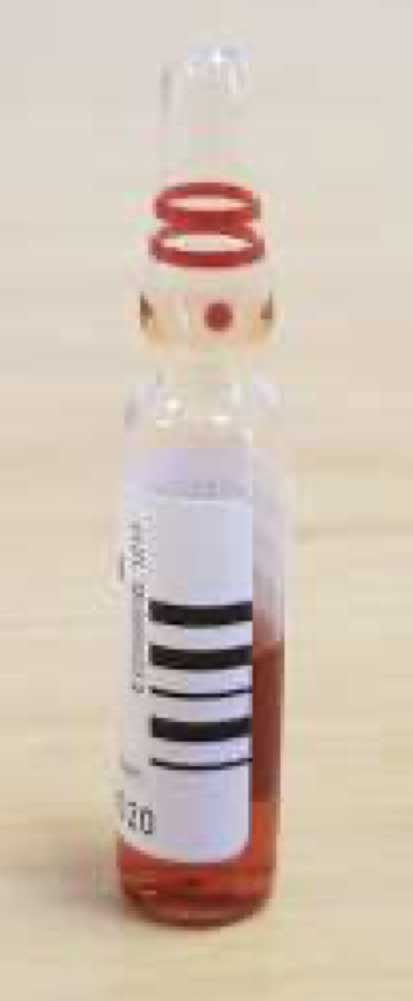
Tap the ampoule - Step 4. Find the red spot on the ampoule and use a tissue to hold ampoule with that facing forward. Snap the top off backwards:
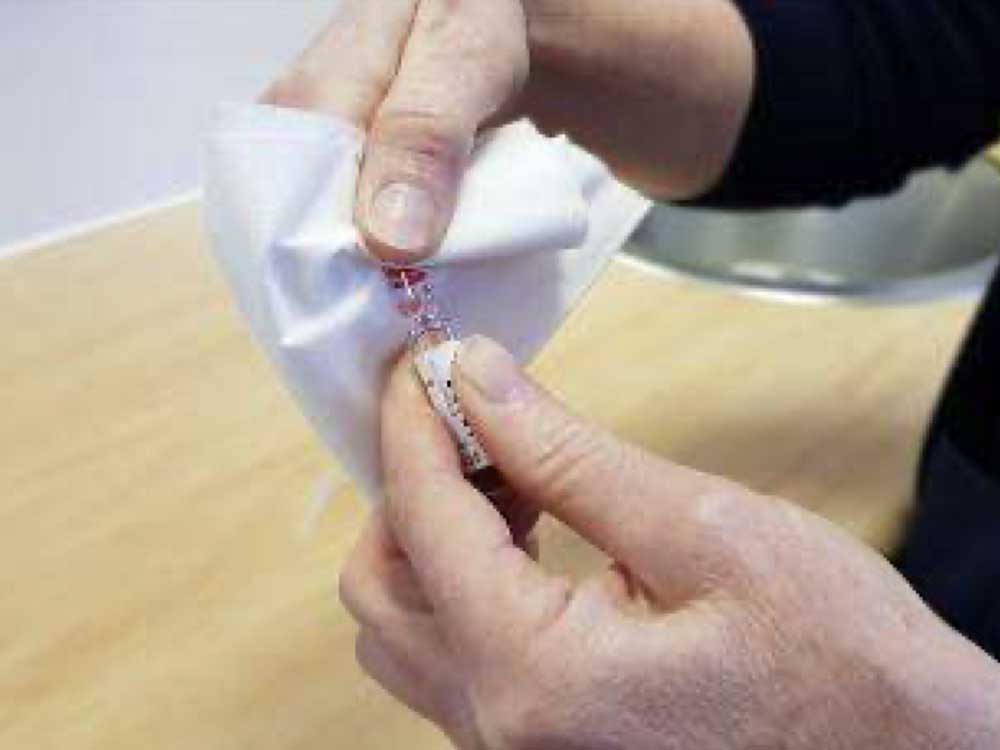
Open the ampoule - Step 5. Discard the top of the ampoule in sharps box
- Step 6. Remove the cap to the green needle and insert into the ampoule and then pull the plunger up to draw up all the red fluid:
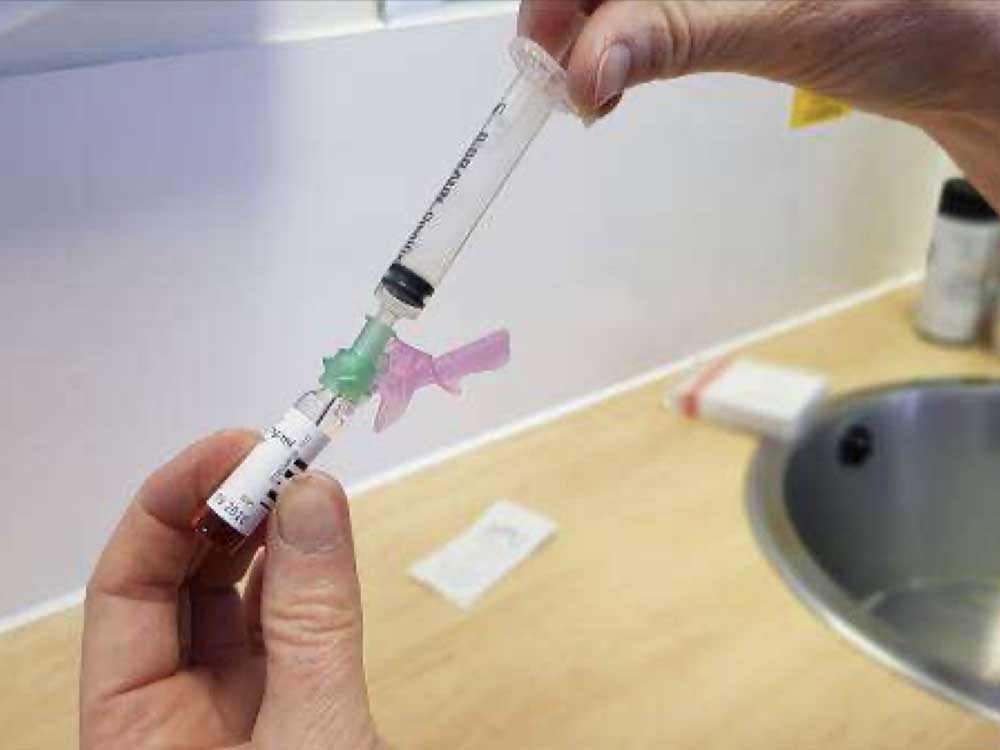
Draw up B12 - Step 7. Discard the bottom of the empty ampoule in the sharps box
- Step 8. Hold the syringe with the green needle at the top and tap syringe so all the fluid is at the bottom
Tap syringe - Step 9. Push up the plunger to expel almost all the air
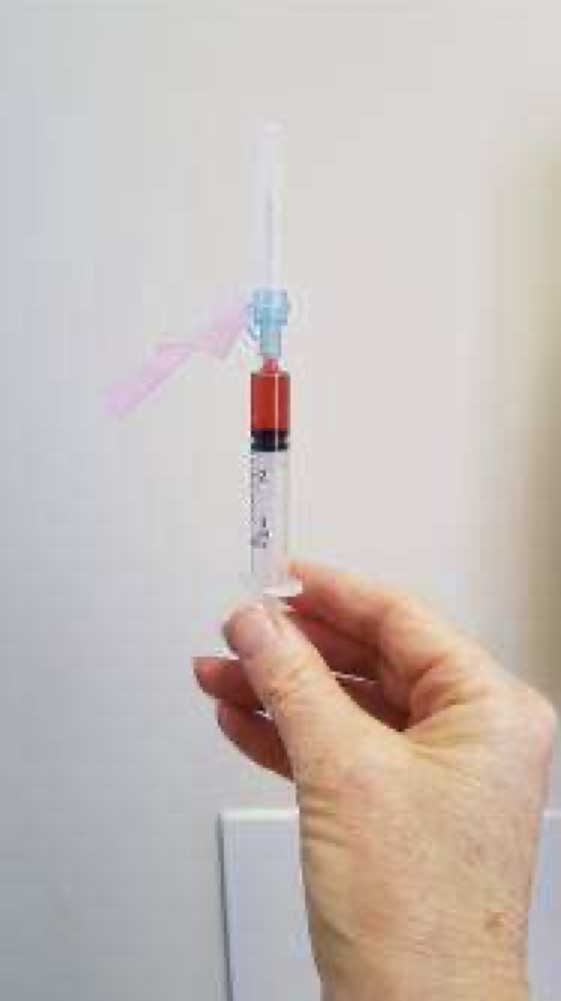
Expel the air - Step 10. Remove the green needle and discard into the sharps box
- Step 11. Attach the blue needle, again without letting the tip of the syringe or the connecting part of the blue needle touch anything else
- Step 12. Hold upright, again with the blue needle at the top and gently push out any remaining air
- Step 13. The injection is now ready to be given
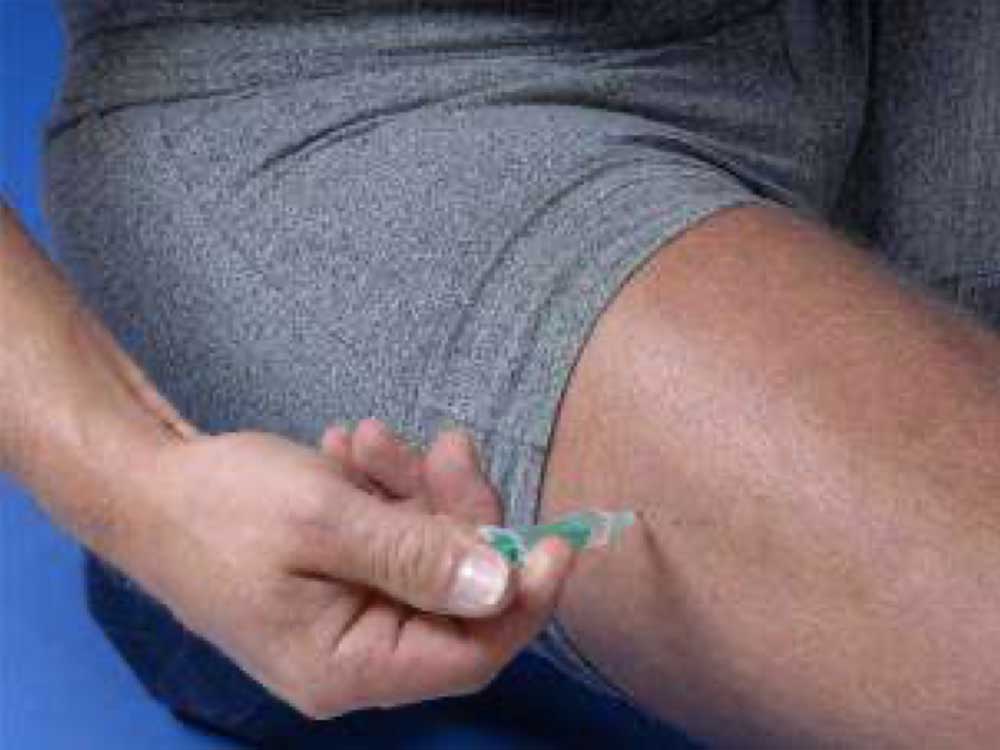
- Step 14. Expose the top of the arm or the outer part of the thigh where the injection will be given
- Step 15. Remove the needle cover
- Step 16. Gently push the needle into the skin until it won’t go any further
- Step 17. Push the plunger slowly down until the syringe is empty
Push plunger slowly - Step 18. Pull the whole thing out and discard straight into the sharps box
- Step 19. Cover or dab with cotton wool if necessary
- Step 20. That's it! There's no step 20
© Dr Michael Wong 2022